Secret Santa
At work this year, I wanted to make my secret santa gift a little interesting. Having been working with wifi for a large part of the year, I thought it would be fun to make a wifi ctf as part of the process.
Overview
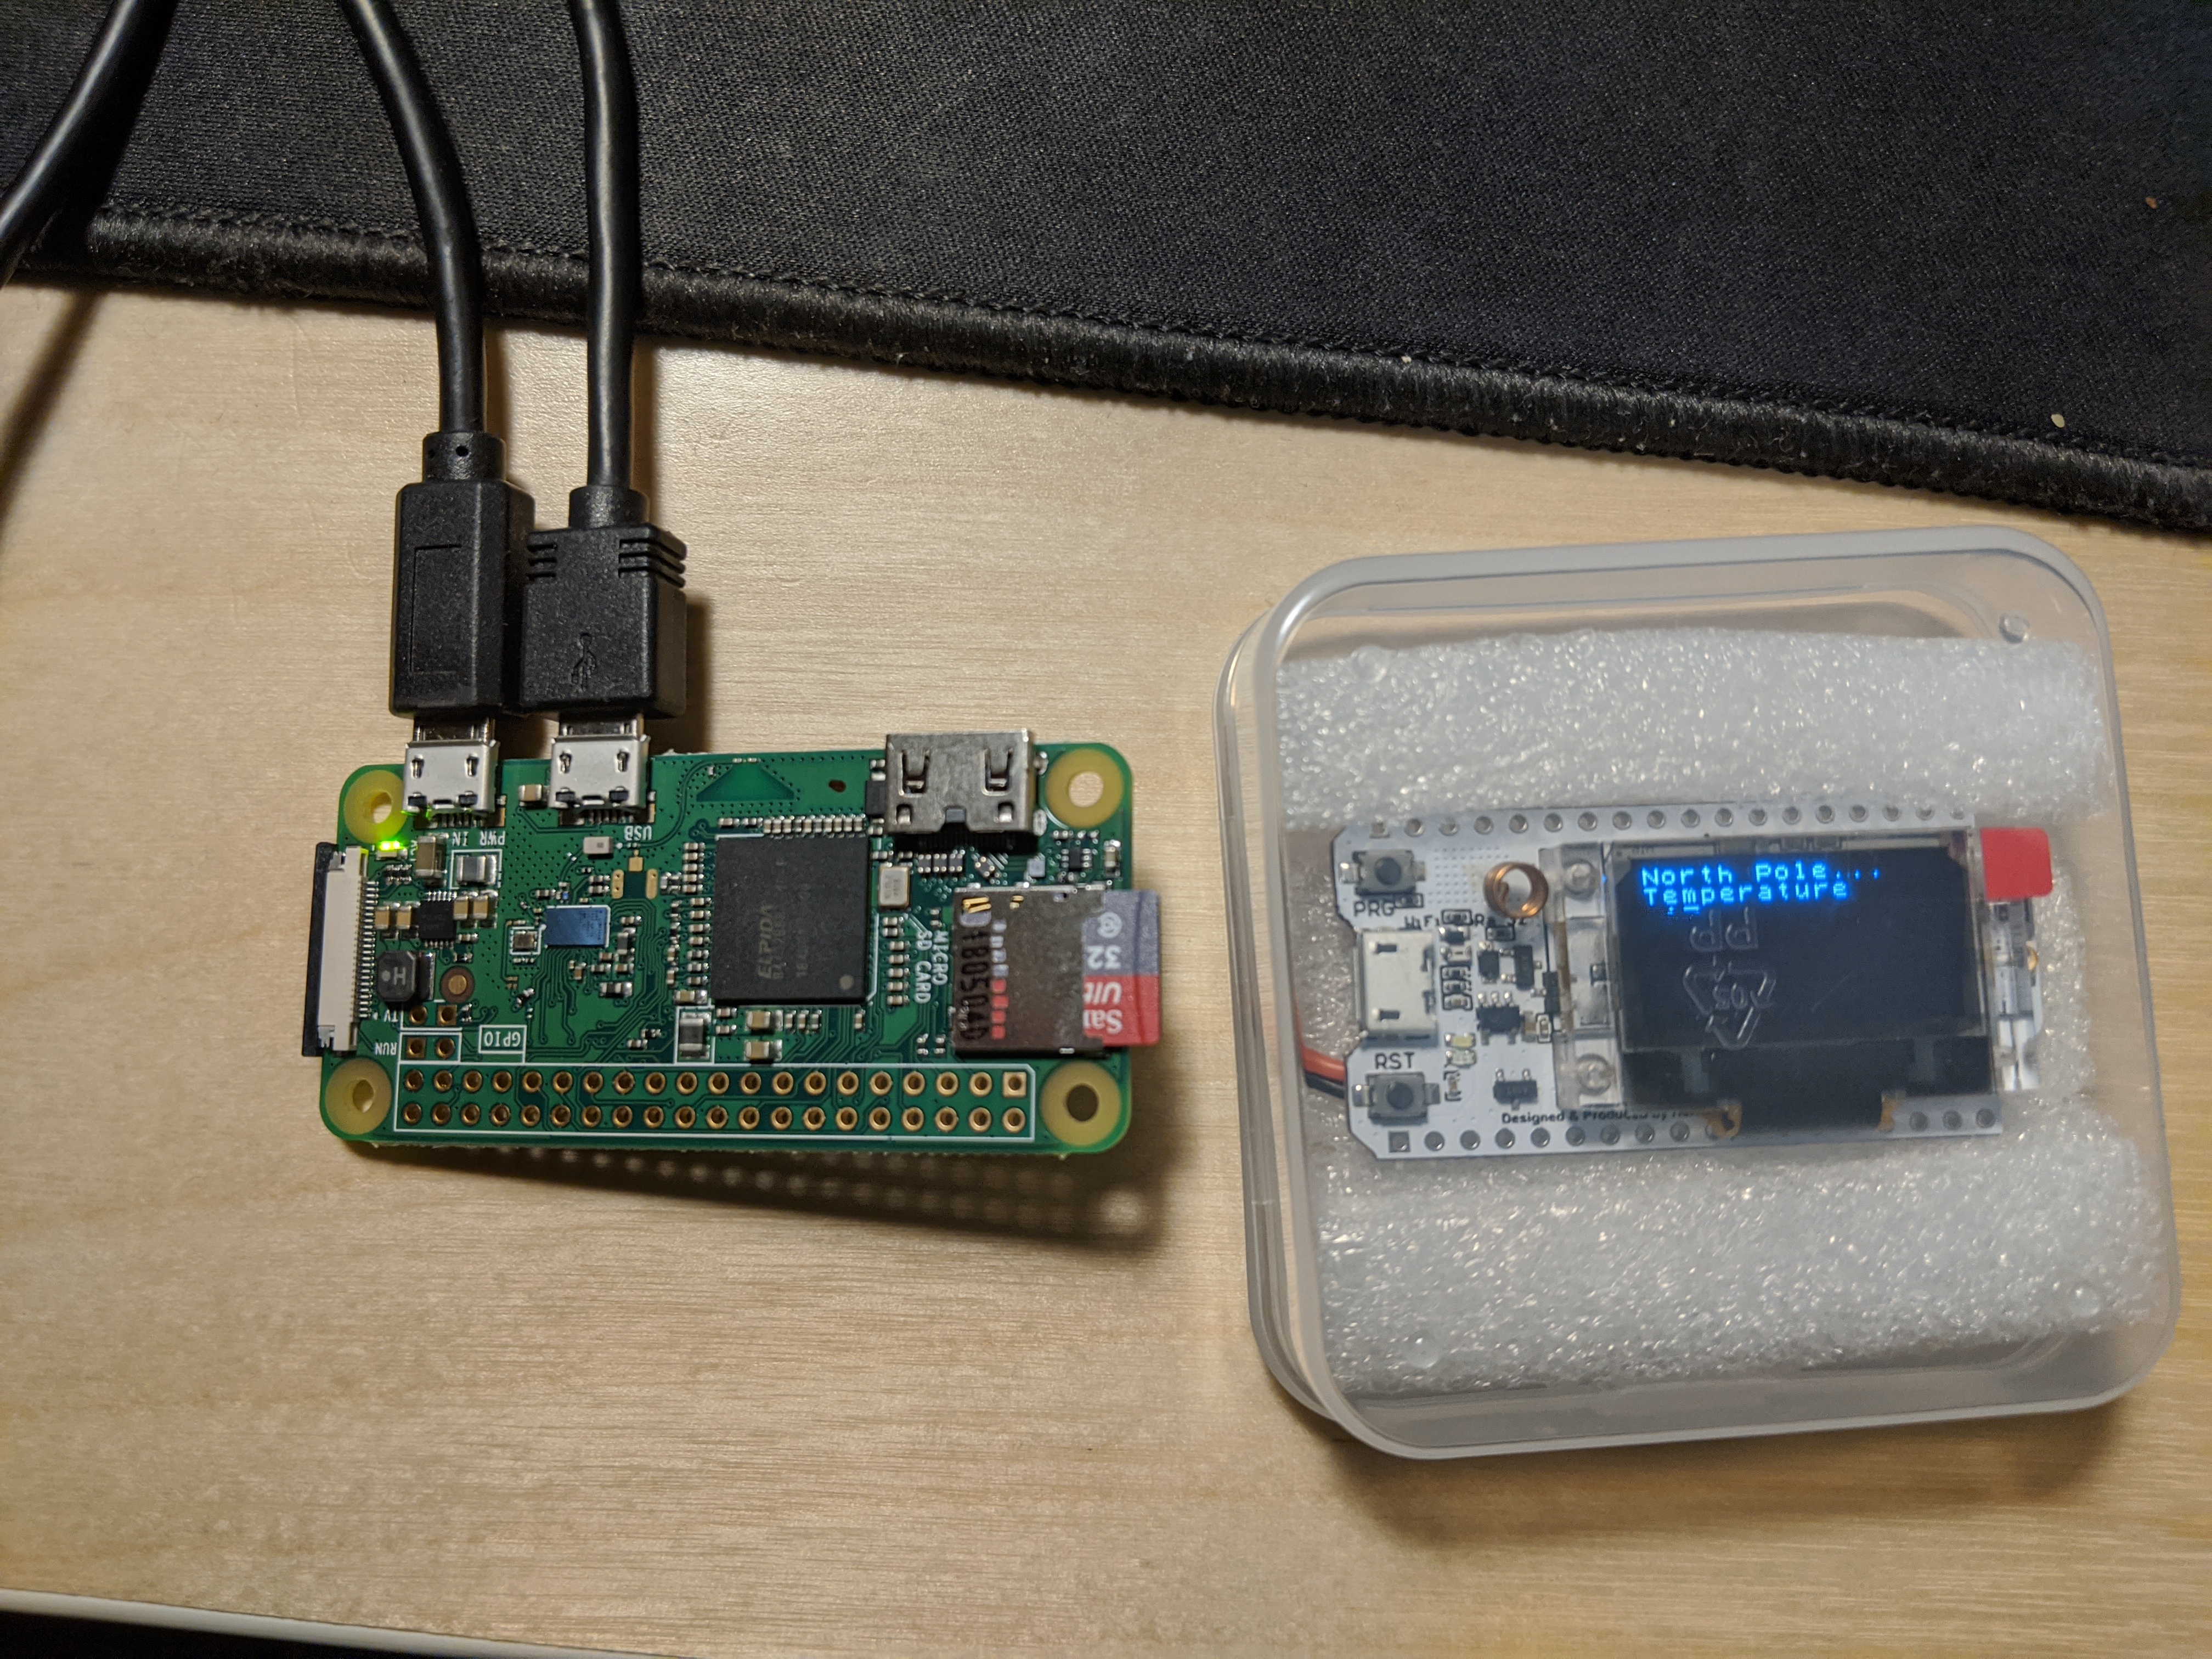
The overall idea is pretty simple: the recipient receives a “North Pole temperature sensor”, which is really an ESP32 with a display showing the RSSI of the hidden access point, where the real present is. The recipient has to figure out that the values change from simply moving around, clueing in that it is measuring something, upon which he’ll quickly realize it’s RSSI from wifi packets. Following the tracker should more or less lead to the general location. However, an alternative solutionis that once he realizes it’s an AP, he can try to hack/ssh into the AP and find the flag, which will tell him exactly where the present is.
Theory
For this game of “hot or cold” to work, we have to understand what RSSI is. RSSI is the “received signal strength indicator”, which as its name implies shows how strong the signal is on a relative scale. This scale differs between manufacturers, but overall the same idea should be conveyed the same - the hotter you are, the higher the value, and the colder you are, the smaller the value. This information is given through what’s called the Radiotap Header, which is metadata your wifi card tacks on to each wifi packet it receives, one of them being the signal strength of that packet.
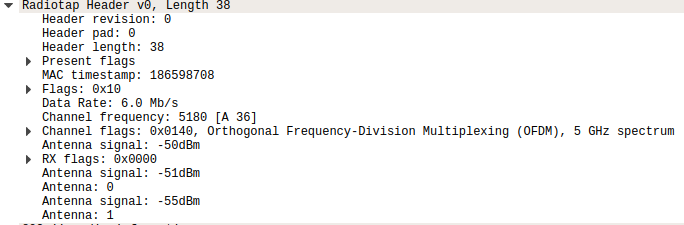
You can see this for yourself if you use a tool such as Wireshark and put your wireless card into monitor mode. Packets you capture should have a section for the Radiotap header with this information.
Materials
- Heltec WiFi-Lora
- Raspberry Pi Zero W
- LiPo battery (for the “locator”)
I mainly used these because these are what I had on hand. The Heltec board is really cool as it came with an OLED display. It also had a LoRa radio on it that I did not use, but you can find one with just the ESP32 wifi SoC and the OLED display. The RPi Zero W is what I used as my access point, as it was pretty simple set up and let it sit and fire beacon packets out.
Access Point set up
The juicy stuff! For the Raspberry Pi, you need to set it as an access point. This is controlled by two services called hostapd and dnsmasq. hostapd handles the configuration for the access point side of things such as what SSID it should broadcast, password, encryption, and channel configuration to list a few things. dnsmasq handles the DNS forwarding as well as DHCP for your IP addresses. Before you start, make sure you can access the Pi through something other than wifi, such as directly connecting to it through an ethernet cable. Then, bring down the services.
sudo systemctl stop hostapd
sudo systemctl stop dnsmasq
Edit the DHCP configuration file for our wireless interface.
sudo vi /etc/dhcpcd.conf
Add this line to it:
denyinterfaces wlan0
Then configure the wireless interface to have a static IP address.
sudo vi /etc/network/interfaces
allow-hotplug wlan0
iface wlan0 inet static
    address 192.168.0.1
    netmask 255.255.255.0
    network 192.168.0.0
    broadcast 192.168.0.255
We then want to configure hostapd.conf so that it knows how to act as an access point.
sudo vi /etc/hostapd/hostapd.conf
interface=wlan0
driver=nl80211
ssid=NORTH_POLE
hw_mode=g
channel=7
wmm_enabled=0
macaddr_acl=0
auth_algs=1
ignore_broadcast_ssid=0
wpa=2
wpa_passphrase=SECRETPASS
wpa_key_mgmt=WPA-PSK
wpa_pairwise=TKIP
rsn_pairwise=CCMP
A few things about this:
interface=wlan0means we’re setting the interface it’s broadcasting on to thewlan0interface, which should be our default wireless interface.ssidis obviously where you set your SSID you want to broadcasthw_mode=gis the 802.11 standard you want the radio to work in. In this case, 802.11g is for working in the 2.4GHz band, which we’ll want for maximum distance.channellets us decide what channel to broadcast on, which is channel 7 on the 2.4GHz band.wpa_passphraseis where you’d provide the password to the network.
Next, we’ll need to point the hostapd service to the correct configuration file we just edited by uncommenting the DAMEON_CONF parameter and providing it with our hostapd.conf path.
sudo vi /etc/default/hostapd
DAEMON_CONF="/etc/hostapd/hostapd.conf"
Lastly, we need to configure dnsmasq to actually hand out IP addresses to devices that connect.
sudo vi /etc/dnsmasq.conf
interface=wlan0
listen-address=192.168.0.1
bind-interfaces
server=8.8.8.8
domain-needed
bogus-priv
dhcp-range=192.168.0.10,192.168.0.50,24h
A few things about what we just did:
interface=wlan0we again set the interfacednsmasqwill be working on towlan0.listen-addressis the address of our radio, which we statically set earlier to 192.168.0.1.server=8.8.8.8is the address of the DNS server for any DNS requests, which we’ve set to Google’s DNS server for now.dhcp-rangeis the starting and ending IP addresses it will give to devices, as well as how long the lease will be for those addresses.
Finally restart the services and hopefully you can see it when you scan for networks to connect to!
sudo systemctl restart hostapd
sudo systemctl restart dnsmasq
If you have issues, you can try debugging by checking their statuses:
sudo systemctl status hostapd
sudo systemctl status dnsmasq
If those have errors, you can check for more details with sudo journalctl -xe
In case he got into the Pi this far, I also left a fl4g file with the exact location of the present. SSH was also left enabled.
Heltec Code
Below is the code for the Heltec board. Essentially, it connects to the hardcoded access point with its credentials and displays the RSSI from packets broadcasted by the Pi. All of the wifi heavy lifting is handled by Arduino’s WiFi library, and the OLED display I used the U8g2 library. To make things easier for the gift recipient, I also send the SSID and PSK as clues over a serial connection when you plug it in.
#include "WiFi.h"
#include <U8x8lib.h>

// the OLED used
U8X8_SSD1306_128X64_NONAME_SW_I2C u8x8(/* clock=*/ 15, /* data=*/ 4, /* reset=*/ 16);

const char ssid[] = "NORTH_POLE";
const char pass[] = "SECRETPASS";

void setup()
{
  Serial.begin(9600);
  u8x8.begin();
  u8x8.setFont(u8x8_font_chroma48medium8_r);
  WiFi.begin(ssid, pass);
  while(WiFi.status() != WL_CONNECTED) {
    u8x8.drawString(0,0,"Connecting...");
    Serial.println("Wifi not connected");
    delay(100);
  }
  Serial.println("Wifi connected");
  delay(100);

}


static void scanRSSI()
{
  char buf[64];
  u8x8.drawString(0,0,"North Pole");
  u8x8.drawString(0,1,"Temperature");
  long rssi = WiFi.RSSI();
  u8x8.drawString(0,2,itoa(rssi, buf, 10));
  Serial.println(rssi);

  // Wait a bit before scanning again
  delay(1500);
  u8x8.clearLine(2);

  Serial.println("NORTH_POLE, SECRETPASS");
}


void loop()
{
  if (WiFi.status() == WL_CONNECTED) {
    scanRSSI();
  }
}
In Action